How to reupholster a dining chair
Replacing the fabric on your dining chairs is a quick and easy way to refresh the look of your whole dining area. It’s amazing how a different colour, pattern or print can change the energy and atmosphere of a room. Combined with different paint on the walls and an upcycled piece of furniture to match, the transformation can be really striking.
On the surface, reupholstering chairs might look easy, and it can be if your chairs are stable and in good condition. Sometimes all they need is the fabric on the seat replacing. However, older chairs can be a little more problematic. Loose joints, scratches and saggy seat foam can all ruin the look you’re striving to achieve. That’s when you might call in the services of a furniture repairer and upholsterer like The Odd Thing.
Types of dining chair
There are lots of different types of dining chairs. A simple drop seat (where the seat pad is easily removable and drops back into place) is the most common. Older chairs might have webbing underneath the seat pad, which can stretch and/or snap over time. Another type I am used to seeing in the workshop is the box seat, where the upholstery is built into the chair.
For the purpose of this blog, I’m going to take you through how to reupholster a drop-seat dining chair.
8 steps to reupholster a drop-seat dining chair
1. Remove the seat pads: Drop seats are usually screwed to the base of the chair. Just remove the screws and the seat should pop out.
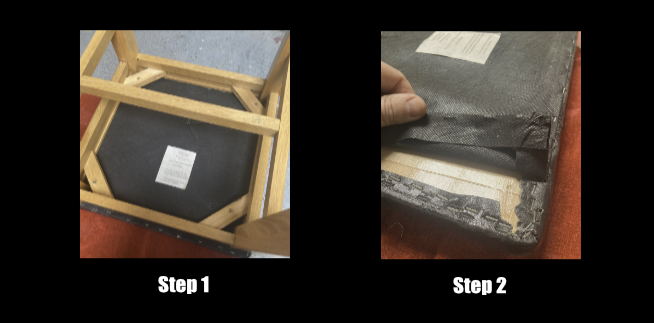
2. Assess the condition of your seat: to see whether you will need new foam or you can re-use the existing materials. Remove the staples or studs on the underside of the pad and take off the old dipryl base cloth. This should reveal the staples of the fabric covering.
This is the most time-consuming part of the job. Extracting old staples can take an age and be hard work on the hands. Persevere - you will get there in the end! In extreme cases I have come across glued-on fabric and trim, which can take some effort to remove.
Tip: Keep the old material in tact to use as a template later on.
3. Choose your new fabric: Definitely the most fun part! Ideally your fabric should be suitable for domestic upholstery and have fire retardant properties.
4. Address and repair any damage: Check the chair frame for wobbly legs, backs, squeaks, scratches, chips and loose paint. Carefully sand and protect bare wood with a specialist furniture wax.
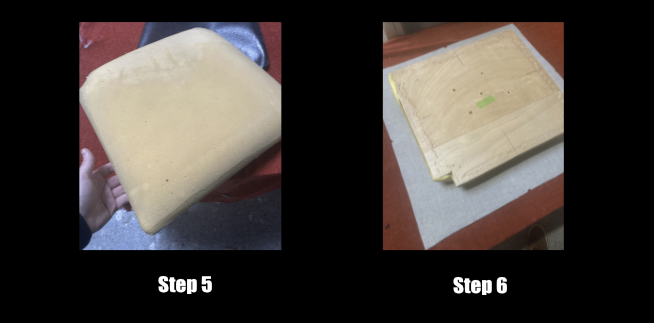
5. Rebuild the seat pad: If the existing foam is in good condition you can re-use this. If you are replacing the foam, use a spray adhesive to secure it to the base board. You can order foam cut to specific measurements online. If want to achieve a curved edge or a dome shape, add extra foam to the centre to create the shape you’re looking to achieve.
Next, cover the foam with minimum 2oz dacron to protect it and create a barrier between this and the fabric.
Tip: Order your foam slightly larger than the seat area, then you can trim it to size. It’s better to have too much than too little.
6. Re-cover with your chosen fabric: Using the old fabric as a template, cut out your fabric. If you don’t have a template, as a rule of thumb measure front to back using a fabric tape measure, then add on two inches (50mm each way). This should give you enough fabric allowance to fold over and staple.
Staple the front and back edges first, followed by the two sides. Use temporary staples on the first go until you’ve got the hang of it, especially with stretchy fabrics which can be tricky to get right. Do the corners last and trim off any excess or bulky fabric to give them a smooth finish.
Tip: Pull the fabric tight! When you finish your seat pad you should not be able to pinch the fabric between your fingers.
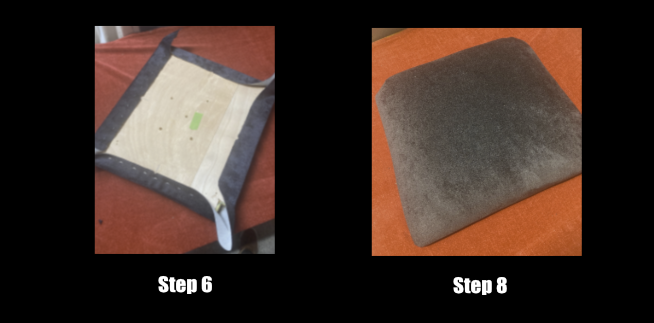
7. Add your finishing touches: Black or white dipryl on the underside of the pad gives a quality finish and covers up the fabric edges and staples. Add trim or stud work if desired.
8. Replace your seat pad: Be extra careful to make sure your screws don’t catch and pull the fabric.
9. Admire your handiwork: I know I said 8 steps, but a glass of something cold is definitely in order!
So there you have it! Eight easy steps to reupholstering a drop-seat dining chair. I hope reading this has inspired you to have a go at a quick, cost-effective solution to updating your dining space. On the other hand, if it has scared the pants off you, drop me a line and I’ll be happy to give you a quote.

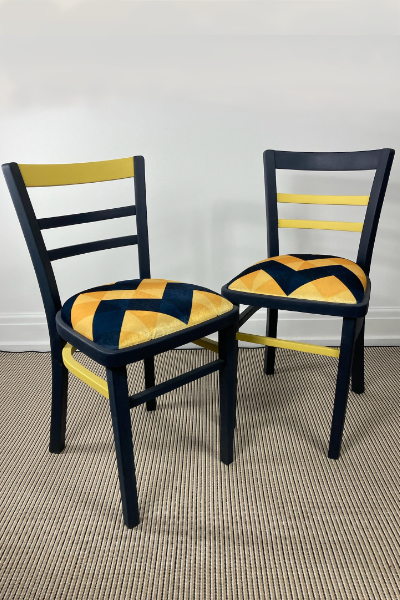
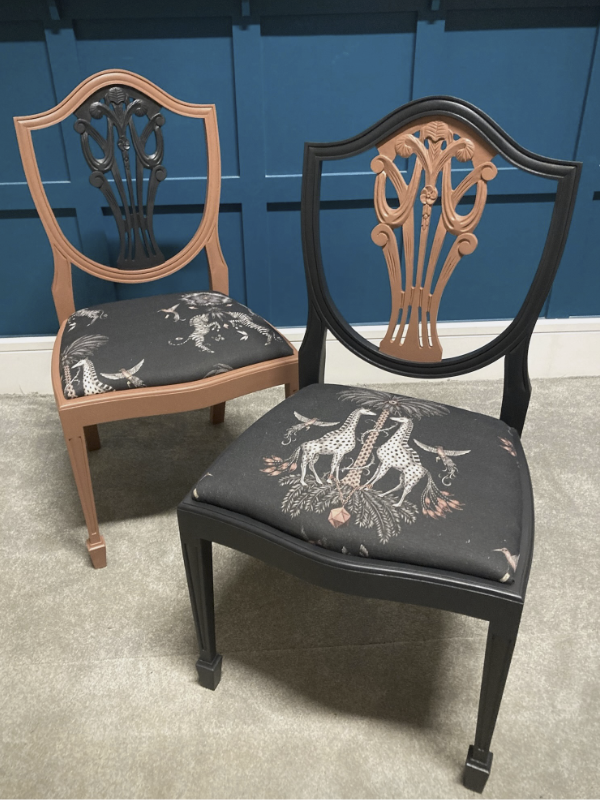
Add a pop of colour to your kitchen or dining space with this pair of compact mid-century dining chairs, painted in a dark blue and yellow design and finished in a unique geometric fabric.
Both chairs are painted using Midnight Blue and Little Star Fusion Mineral Paint with a Beeswax finish to all surfaces. Different features have been highlighted on each chair.
The striking velvet geometric fabric is a genuine ‘Odd Thing’ feature. One of my own designs that’s both sympathetic to the age of the chair and adds a modern twist.
Sold as a pair.
Approx. dimensions
Height: 81cm
Width: 39.5cm
Depth: 41cm
Upcycled
All of our upcycled items have been expertly brought back to life using hand crafting techniques and high quality materials. They are perfect for people looking for something unique for their home.
Delivery
FREE DELIVERY to Warrington, CW8 and CW9 postcodes.
The list price does not include delivery to postcodes outside of these areas. Please email us before purchasing to obtain an accurate delivery quote. You are welcome to arrange collection from our workshop near Northwich, Cheshire.